DIY Nail Art: Easy Designs You Can Try at Home


Introduction to DIY Nail Art
Nail art has become an increasingly popular way to express creativity and style. With a few simple tools and a bit of practice, you can create stunning designs right at home. Whether you're a beginner or have some experience, these easy DIY nail art designs are perfect for spicing up your manicure routine.

Essential Tools for Nail Art
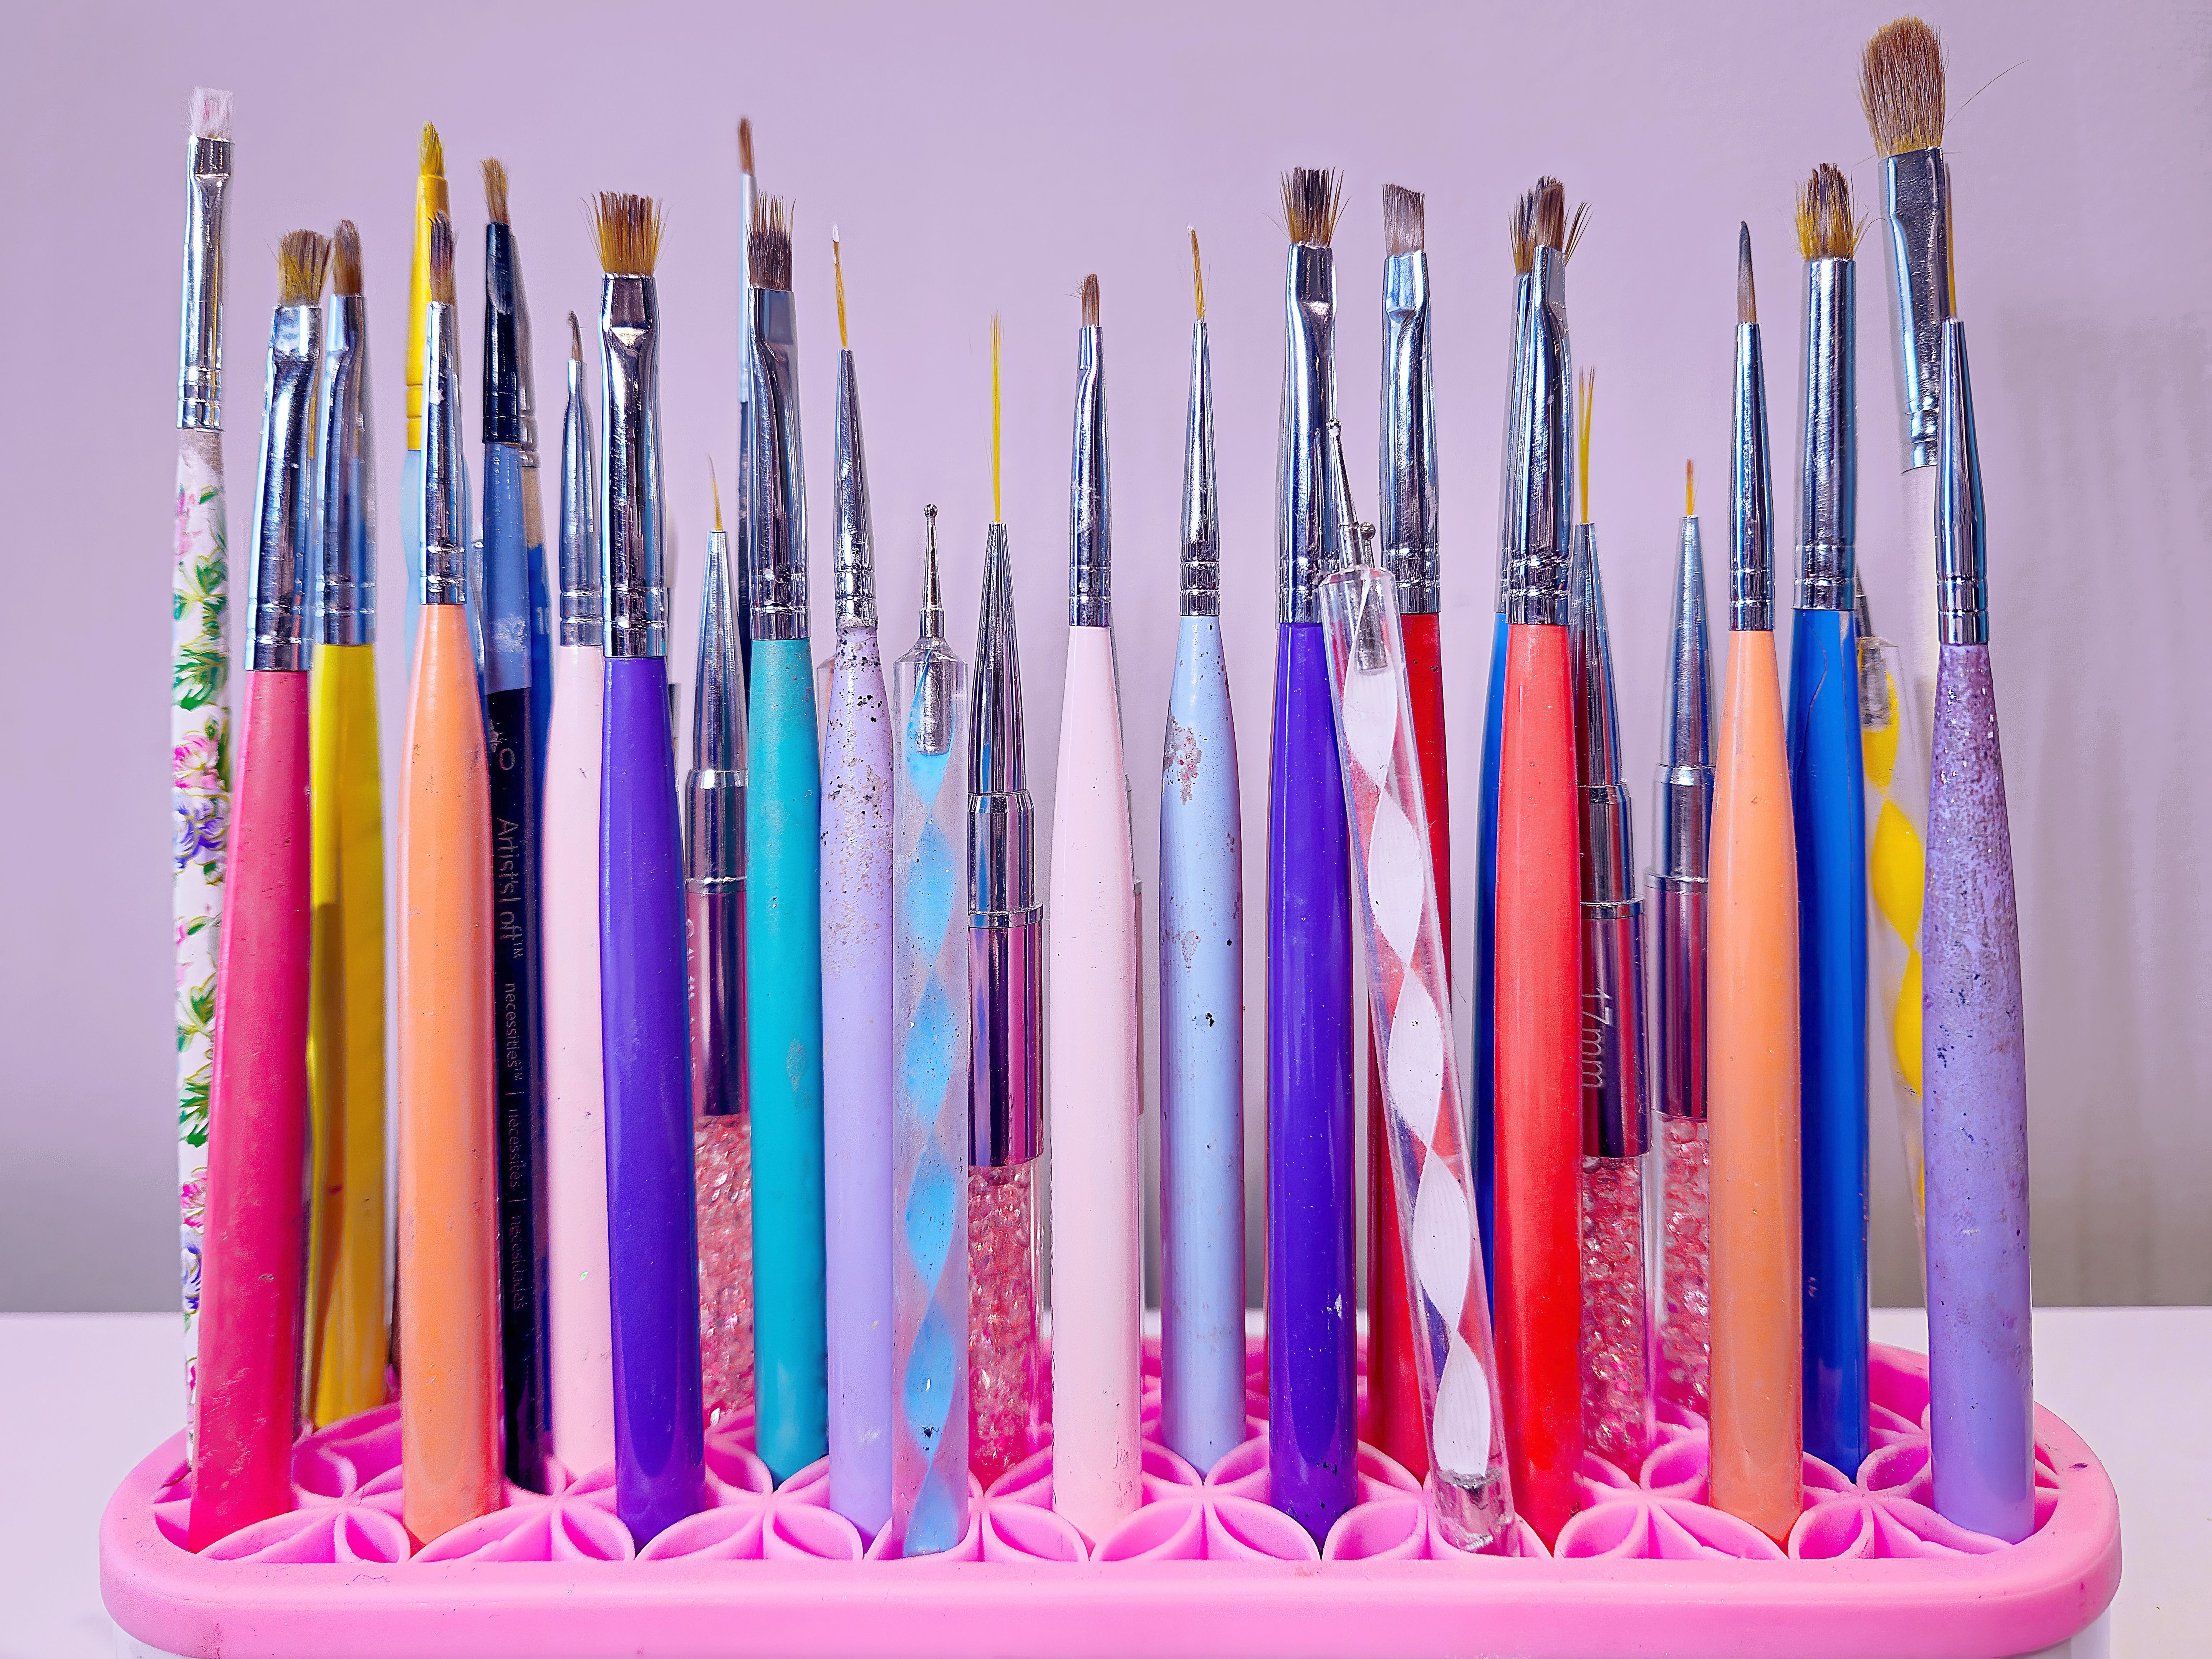
Before diving into the designs, it's important to gather some basic tools that will make the process easier and more enjoyable. Here are the essentials you’ll need:
- Nail polish: Choose a variety of colors to give you more design options.
- Top coat and base coat: These will help protect your nails and make the designs last longer.
- Nail art brushes: Thin brushes are essential for creating precise lines and details.
- Dotting tools: These are perfect for making dots, which are the basis for many designs.
- Striping tape: Useful for creating clean lines and geometric patterns.
Polka Dot Delight
The polka dot design is a classic choice that’s both simple and chic. To achieve this look, start with a base color of your choice. Once it's dry, use a dotting tool to apply contrasting dots across the nail surface. You can use a single color or mix and match for a more playful look.
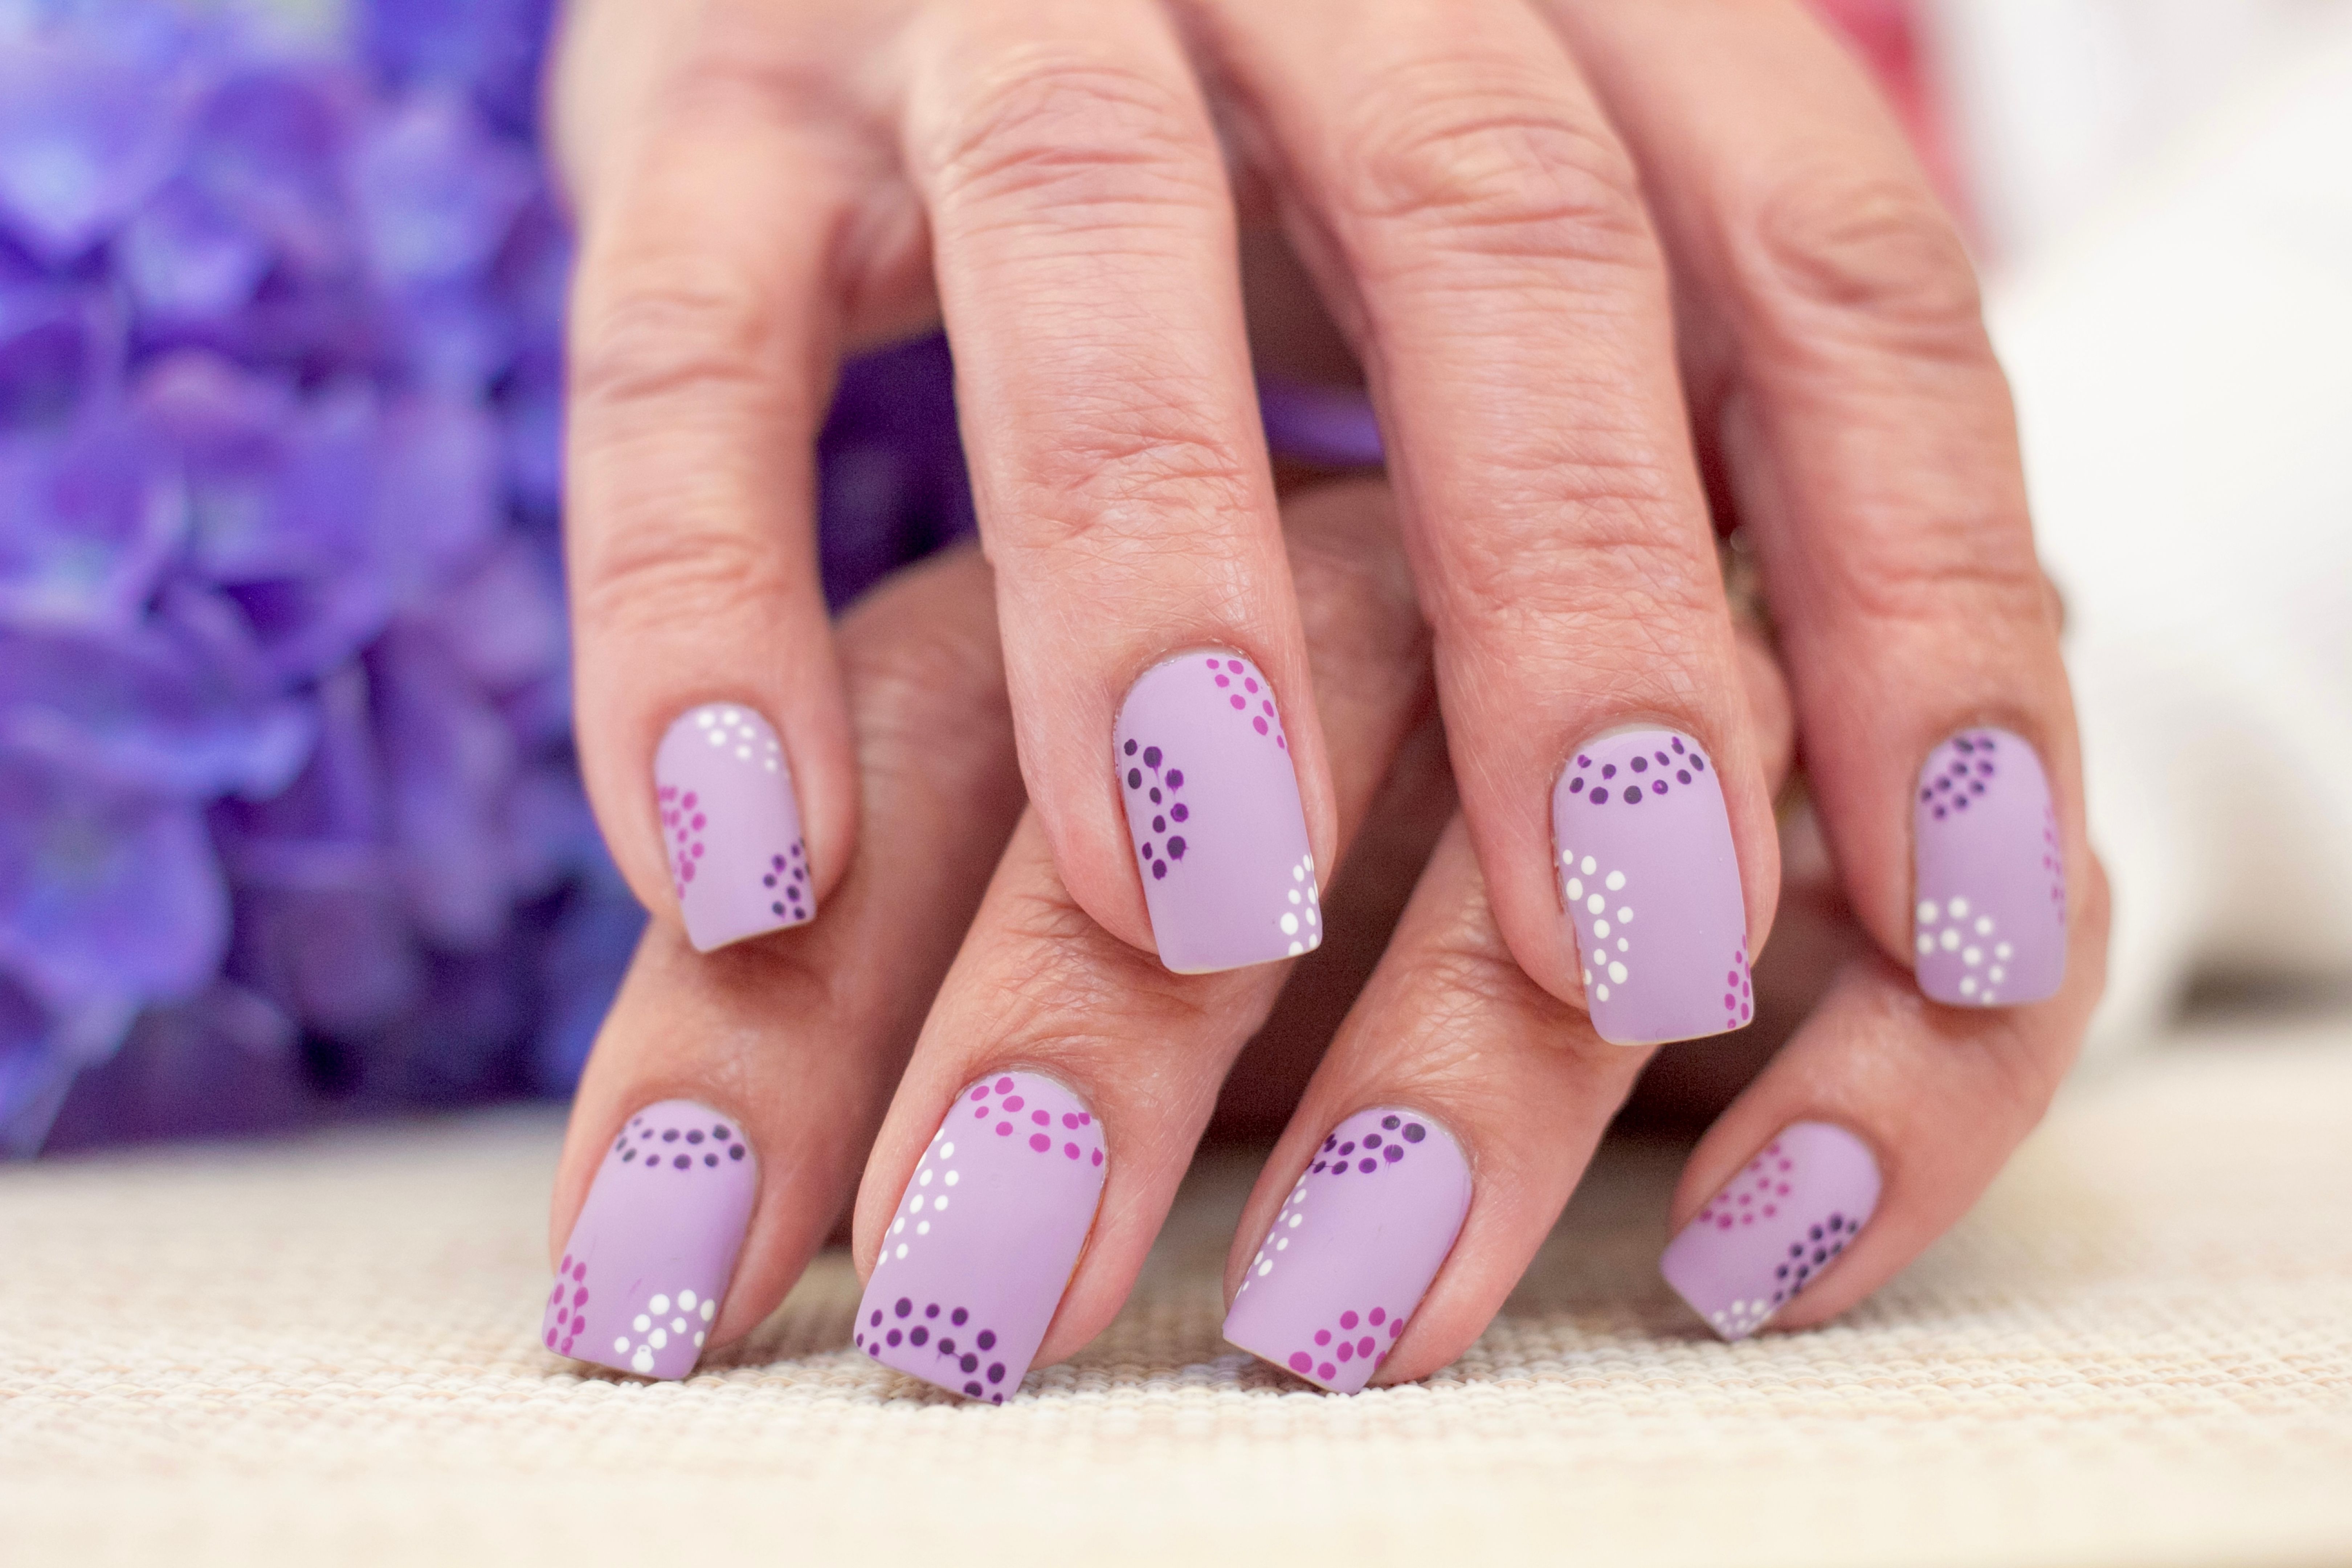
Step-by-Step Guide:
- Apply a base coat to protect your nails.
- Paint your nails with the base color and allow it to dry completely.
- Dip your dotting tool into the contrasting polish color.
- Create dots on each nail, ensuring they are evenly spaced.
- Finish with a top coat to seal the design.
Simple Stripes
Stripes can add a touch of sophistication to any manicure. This design can be customized with different colors and widths to suit your style. Start by painting your nails with a base color. Once dry, use striping tape to outline the areas where you want stripes. Paint over the tape with another color, then remove the tape to reveal clean, crisp lines.
Tips for Perfect Stripes:
For best results, ensure your base coat is completely dry before applying striping tape. Use tweezers to place and remove the tape carefully. Experiment with different angles and directions for a unique twist on this classic design.
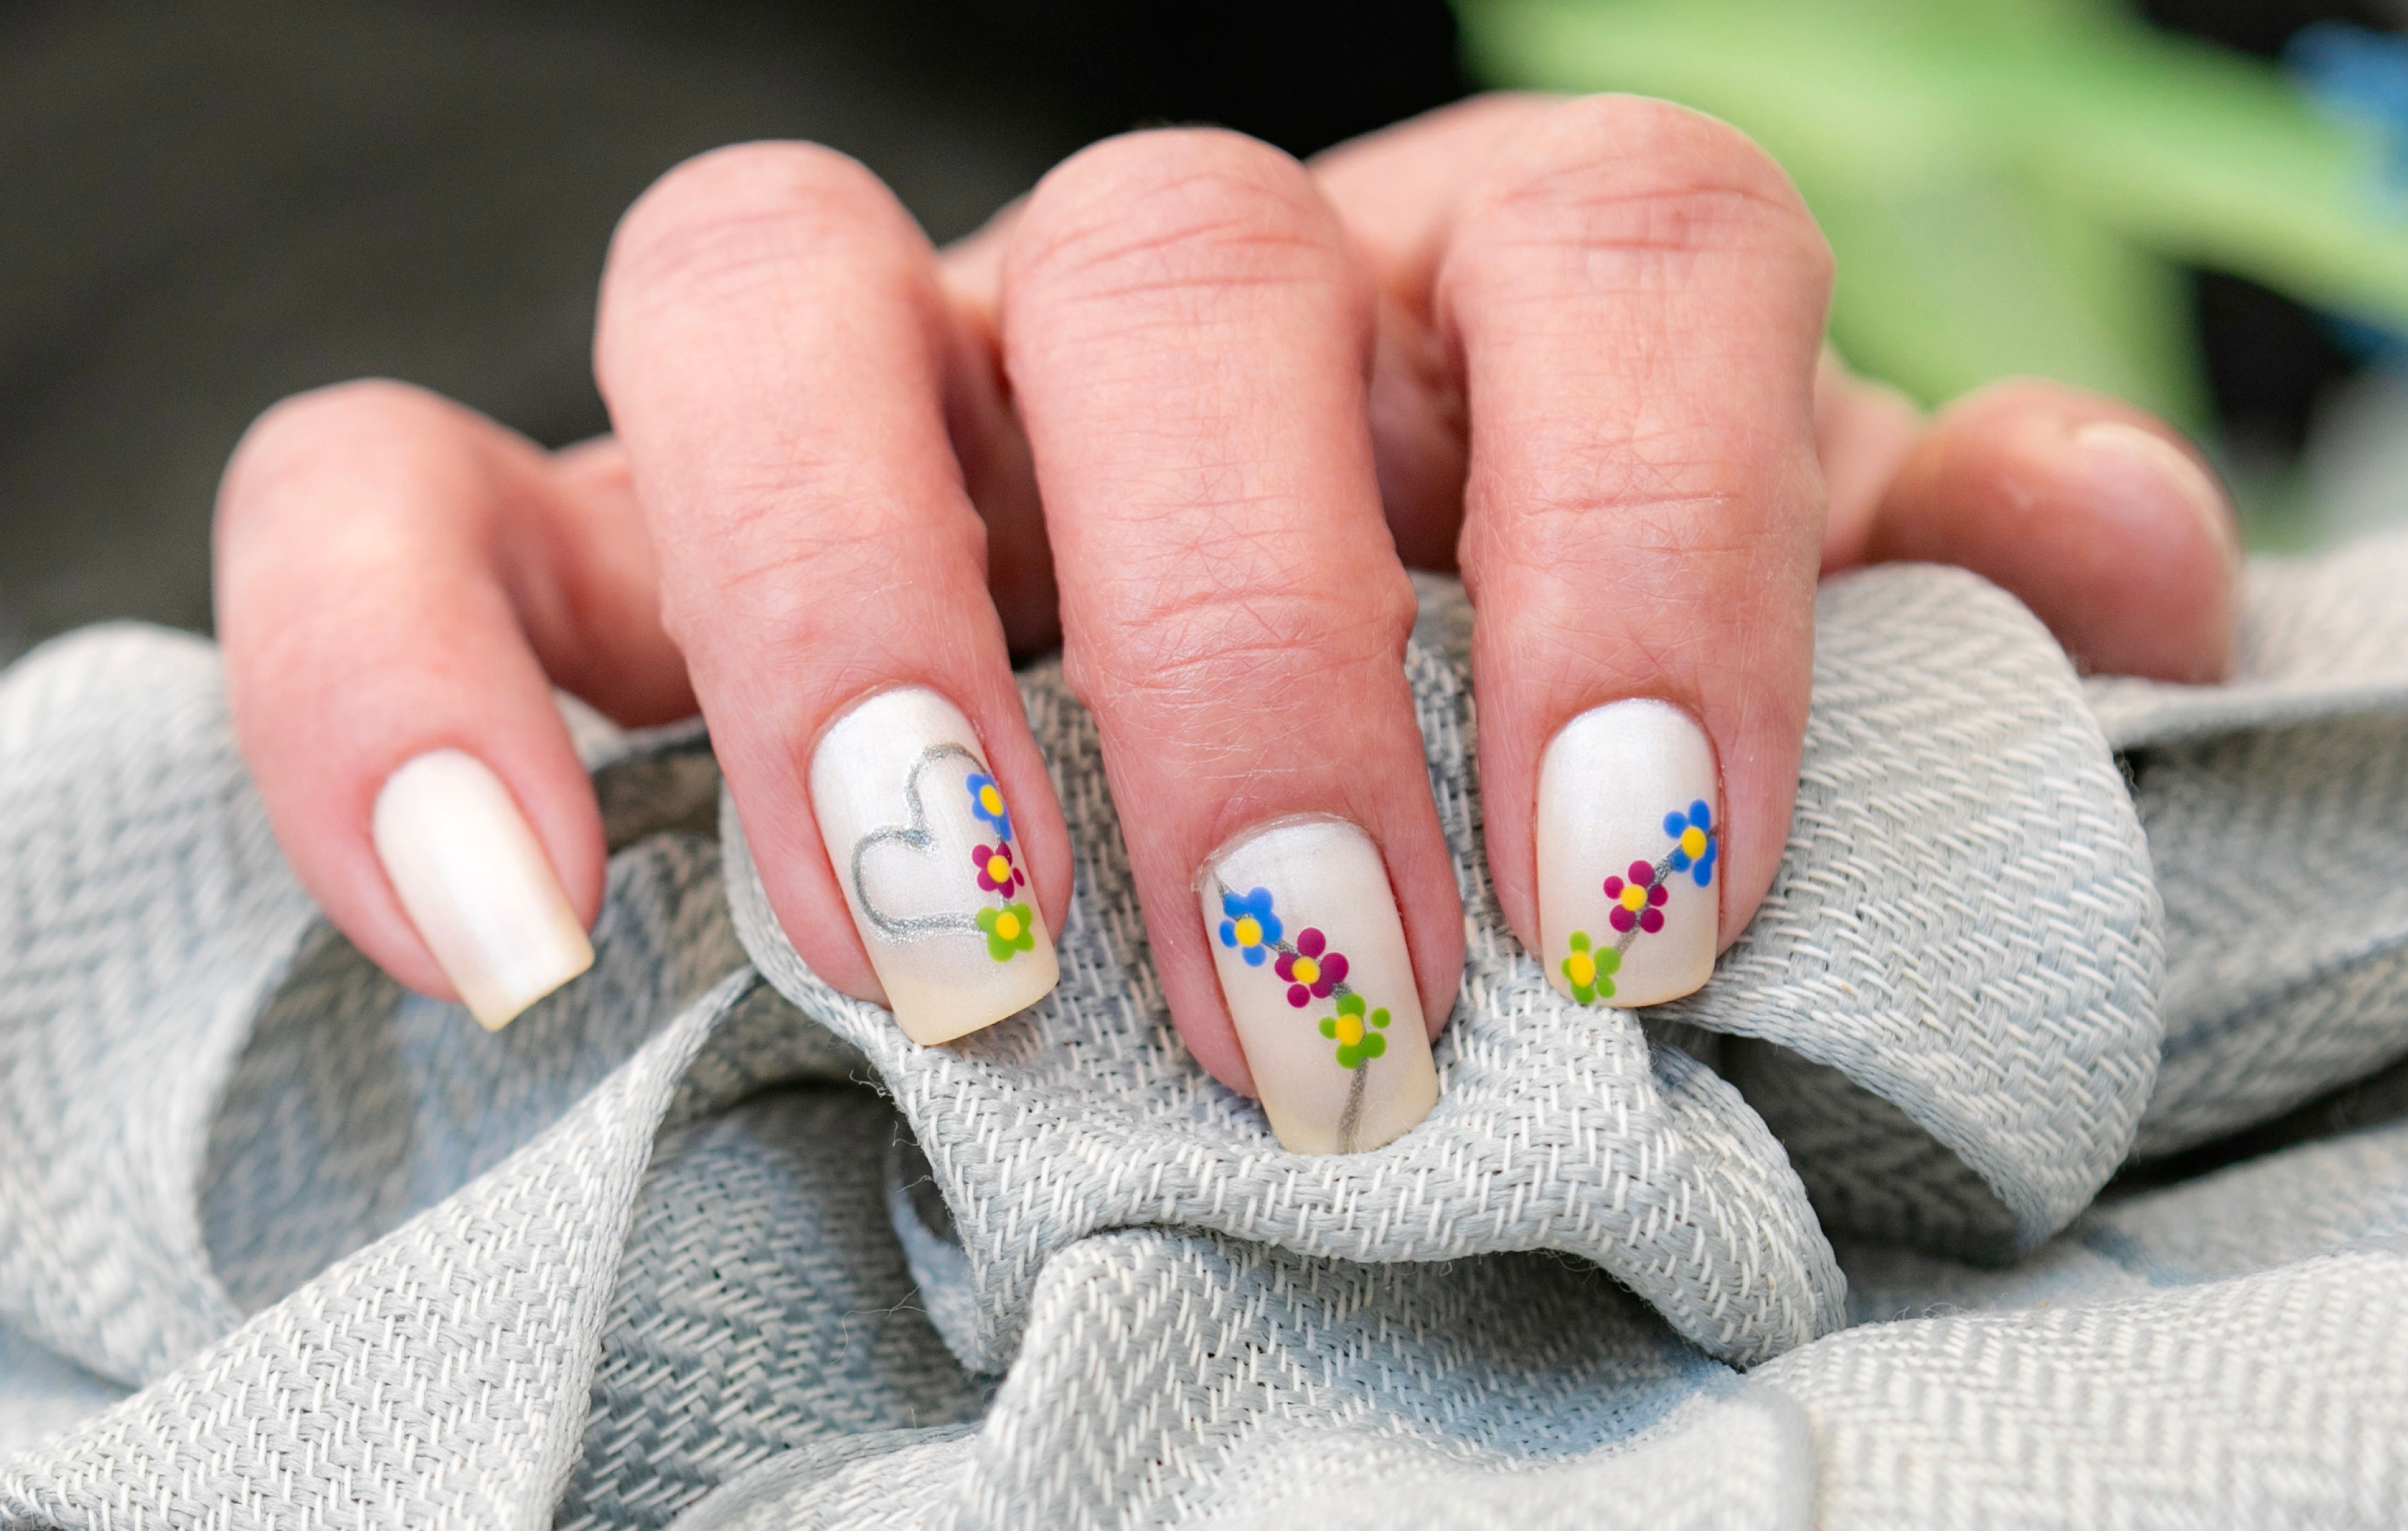
Floral Accents
If you’re looking to add a touch of nature to your nails, floral designs are the way to go. You can create simple flowers using a dotting tool and a couple of complementary colors. Start with a solid base color, then use the dotting tool to create flower petals. A smaller dot in the center completes the flower.
Creating Floral Designs:
To make the flowers pop, use colors that contrast well with each other. For example, if you have a light base color, choose darker shades for the flowers and vice versa. This will ensure your floral accents stand out beautifully against the background.
Conclusion
DIY nail art is a fun and rewarding way to express your personal style. With these easy designs, you can experiment with different colors and techniques to create unique looks that reflect your personality. Gather your tools, set aside some time, and let your creativity flow as you transform your nails into tiny canvases of art.